Cheese is essentially preserved milk, and nearly every cheese is brought into being through roughly the same process, beginning with the milk. The vast array of cheese types are created by slight variations in the steps of this process. We’d like to detail our process on a blue cheese to give a general idea of the steps in cheesemaking, which, at its best, is mostly skill and yet partly art, luck, or simple grace.
It starts with the milk
Raw cow’s milk in our case. Before we begin, we try to be aware that milk is somewhat sacrosanct. It’s responsible for mammalian life. Without it the world would be nothing but reptiles, fish, insects, etc. Which, though fine, would be a bummer for obvious reasons. Yet even with its vital importance in allowing things like literature and cat videos to exist, milk is only made up of a few components: water, sugar (lactose), proteins, fat, minerals, and enzymes. The goal in cheesemaking is to preserve as much of these components as possible, except the water. We want to lose the water, in order to preserve the milk, and because we’re adults now and can get our own water.
The fresher the milk the better. Raw milk much over 24 hours old is suboptimal for cheesemaking, as the enzymes and bacteria in the milk start to replicate, which is undetectable in the fluid milk but will come through as weird flavors in the final cheese. We generally make milk into cheese within a day from when it leaves the cow. The healthier the milk the better. Healthy, well-fed animals make good milk. That’s obvious, perhaps, though milk quality makes a huge impact in raw milk cheese made in an artisanal setting.
Different cow breeds have different milk profiles – fat and protein content – and we chose our Normande and Ayrshire cows as they have excellent profiles for cheesemaking – high fat, high protein, in nearly equal amounts.
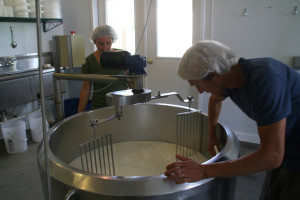
Step 1: Get a bunch of fresh milk from healthy animals together, put it in a stainless steel vat, heat it, and add cheese cultures.
Cultures are bacteria and molds that replicate in the milk, consuming the lactose and making lactic acid, and creating certain cheese flavors and qualities in the process. Different cultures have different properties – some will create a creamy texture, some a nutty flavor, some create gas that makes those eyes in cheeses like swiss, on and on. There are hundreds of cultures, what you use depends on what you want in the end.
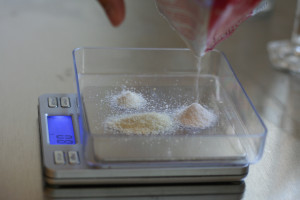
Our cultures come freeze-dried in powder form – grown and packaged in labs in France and Italy, mostly. Because the cultures replicate in the milk, we only need to add very small amounts. Like 0.2 grams in some cases.
All cultures have an optimal temperature for their growth – generally between 70 – 98 degrees. Anything more or less and they will not grow well, if at all, and your final cheese will be bad, if not dangerous. For our blue cheese we use five different cultures, heating the milk to 89 degrees or so before adding them.
Step 2: Let the cultures develop
This requires simply waiting – usually an hour or more, depending on the cheese. During this time the cultures are replicating in the milk, consuming the lactose and creating lactic acid. As they create lactic acid, the milk acidifies. This is very important. Raw milk has a pH of about 6.7 – relatively neutral. As the cultures grow the pH will drop, reflecting the acidification process. Every cheese has an optimal pH the milk should reach at each subsequent step in the cheesemaking process. We want to hit these targets in order to make the best cheese. So before we move on to the next step, we test the milk’s pH. Our blue needs to reach a pH of about 6.4 before we know to move forward. This usually takes about 1.25 hours. During this time we leave the room and play music or the radio for the ripening milk. It may be silly, but we’re in charge here.
Step 3: Add rennet
Rennet is amazing stuff. It’s an enzyme present in a calves’ stomachs that breaks apart the protein chains in liquid milk and re-assembles them into little round nets.
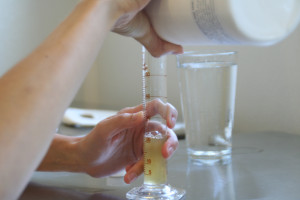
These nets trap the fat and minerals in the milk and separate out the water, essentially turning the milk into a solid food. We’re mimicking this process when we add rennet to the ripened milk. Most cheeses use about 10ml of rennet for 100 liters of milk – and after about 45 minutes the entire vat of milk is set (like weak jello) – because the proteins have all bound together. This process is tenuous in the beginning, and the vat needs to be undisturbed while setting. Even small ripples in the milk will break the weak bonds and could ruin the cheese.
Step 4: Cut the curd
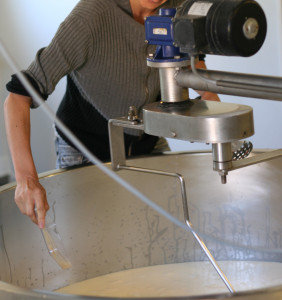
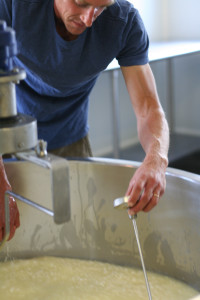
Once the milk is set into the gel stage, it is cut into curds. This is accomplished using stainless steel knives – they rotate through the coagulum and cut it into 1/2 inch cubes for the blue cheese. Different cheeses have different curd sizes (our Alpine needs 1cm cubes). As a general rule – the softer the cheese you are trying to make, the larger the curd size. The reason for this is that larger curds will hold more moisture than smaller curds during the next step.
Step 5: Heating and stirring
Heating and stirring the curd serves one purpose – to remove whey from the curd. Whey is the mixture of water and whatever else wasn’t trapped by the protein nets – usually minerals, protein strands, and some fat. But it’s mostly water. The more the curds are stirred and heated, the more the protein matrix tightens, the more whey they push out, and the drier they get. Hence, the drier the cheese you’re trying to make, the longer you stir and the more you heat during this step. Cheddar, for example, we will heat to nearly 117 degrees and stir for an hour and a half with increasing violence. Our blue, since it is a rather moist cheese, we keep at 89-90 degrees and stir gently for only 25-30 minutes. Even during this brief time the curds will shrink to half their original size as they push out the whey.
Step 6: Drain the whey and hoop the curd
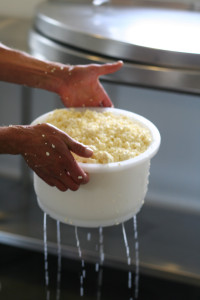
When the curds have reached the appropriate moisture levels for the desired cheese, it’s time to drain off the whey and put the curds into moulds (called hooping) to form them into the cheese shape you want. The whey drains out through the bottom of the vat, we pump it outside and feed it to pigs. It’s excellent pig food. We also spread it on fields. It’s excellent field food as well. Once the whey is gone, the curds are scooped and packed into moulds, where they gradually knit together into a cheese shape we all recognize. Different cheese have different moulds – our blue is a relatively small cylinder (about 4 lbs at the end), but our cheddar and alpine are wider and closer to ten pounds each.
Step 7: Press and salt
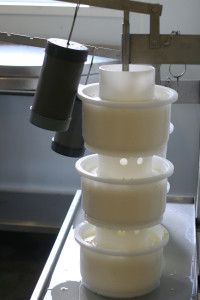
Almost all cheeses are pressed and salted in some way. Pressing helps knit together the individual
curds into a single cheese, and salting adds flavor and long-term character, as well as removing moisture from the cheese. The harder the cheese the longer and with greater pressure it will be pressed. Our blue, being a relatively soft cheese, presses 16 hours under its own weight (or a few stacked on top of each other), while our Alpine will press for nearly 30 hours under increasing weight in a mechanical press. Salting can be done a number of ways – floating in a 22%-24% brine (our blue is brined for 24 hours or so), salting the curd itself before its pressed (like our cheddar), salting the milk when you add the culture (like our cheesecake), or dry salting the finished cheese. Different cheeses prefer different methods of salting, in short.
Step 8 – Final Step!: Age the Cheese
Once the cheese is out of the press and salted, it heads to the cave, where it will age for anywhere
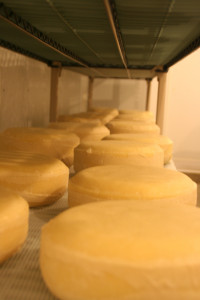
from 60 days (Cheesecake), 120 days (Blue), 9 months (Alpine), to 12 months (cheddar). There are some cheeses in the world that age for 20 years. We do not do that. The aging of cheese, or affinage as they call it in French, is an involved process. Every three days or so we flip all our cheeses in the cave, wash the Alpine with a mixture or bacteria and salt, wash the blues with brine, and brush the cheddar. The cave is kept at a constant 48-50 degrees with 80-85% humidity, which is no small task for our equipment, in the depths of summer and winter, especially. We test the cheeses every month or so, and if they’re developing nicely, well, when they’re ready we sell them.
And that, friends, is the cheesemaking process. Not a huge deal, but also not the easiest thing. There are many ways things can go wrong within these steps, and undesirable variations that result in the final cheese. If you’re making any large quantities of cheese ever for the first time, please, get some pigs. They will be well fed. We got a few this first year and besides the constant whey they benefited from many pounds of blue and alpine that we didn’t feel good selling. They are not picky, happily. Pigs are like the opposite of critics, which is gratifying, even in disaster.
